
.svg)

Table of Contents
How to set up Mindee with Zapier?
If you already use Mindee to extract structured data from documents, you know how much time it saves your team.
Now, imagine pairing that with Zapier to automatically send extracted data wherever you need it: Google Sheets, Notion, Airtable, QuickBooks, or your internal CRM.
That’s exactly what the Mindee + Zapier integration does: it connects Mindee’s document parsing capabilities with your favorite business tools, without writing a single line of code.
Why connect Mindee to Zapier?
Manual document processing often involves switching between apps: uploading a document, downloading results, pasting data into spreadsheets, and triggering follow-ups.
With Zapier, you can eliminate those steps entirely: every time a document is received (for example, in Gmail or Google Drive), Mindee automatically extracts the data, and Zapier routes it to the next tool in your workflow.
Typical use cases:
- Send invoice totals and due dates from Gmail attachments to QuickBooks.
- Extract receipt details and push them into an expense tracker.
- Parse ID cards or passports and send the extracted data to your KYC database.
- Log parsed data into Google Sheets for review or analytics.
How the integration works
Zapier works through “triggers” and “actions.”
Each time your trigger fires, Zapier sends the document to Mindee’s API. Mindee processes it, extracts the structured fields, and Zapier makes that data available to any of your connected apps.
You can extract data from any of your document use cases (invoices, receipts, ID cards, passports, or even custom models).
How to set up your Zap with Mindee
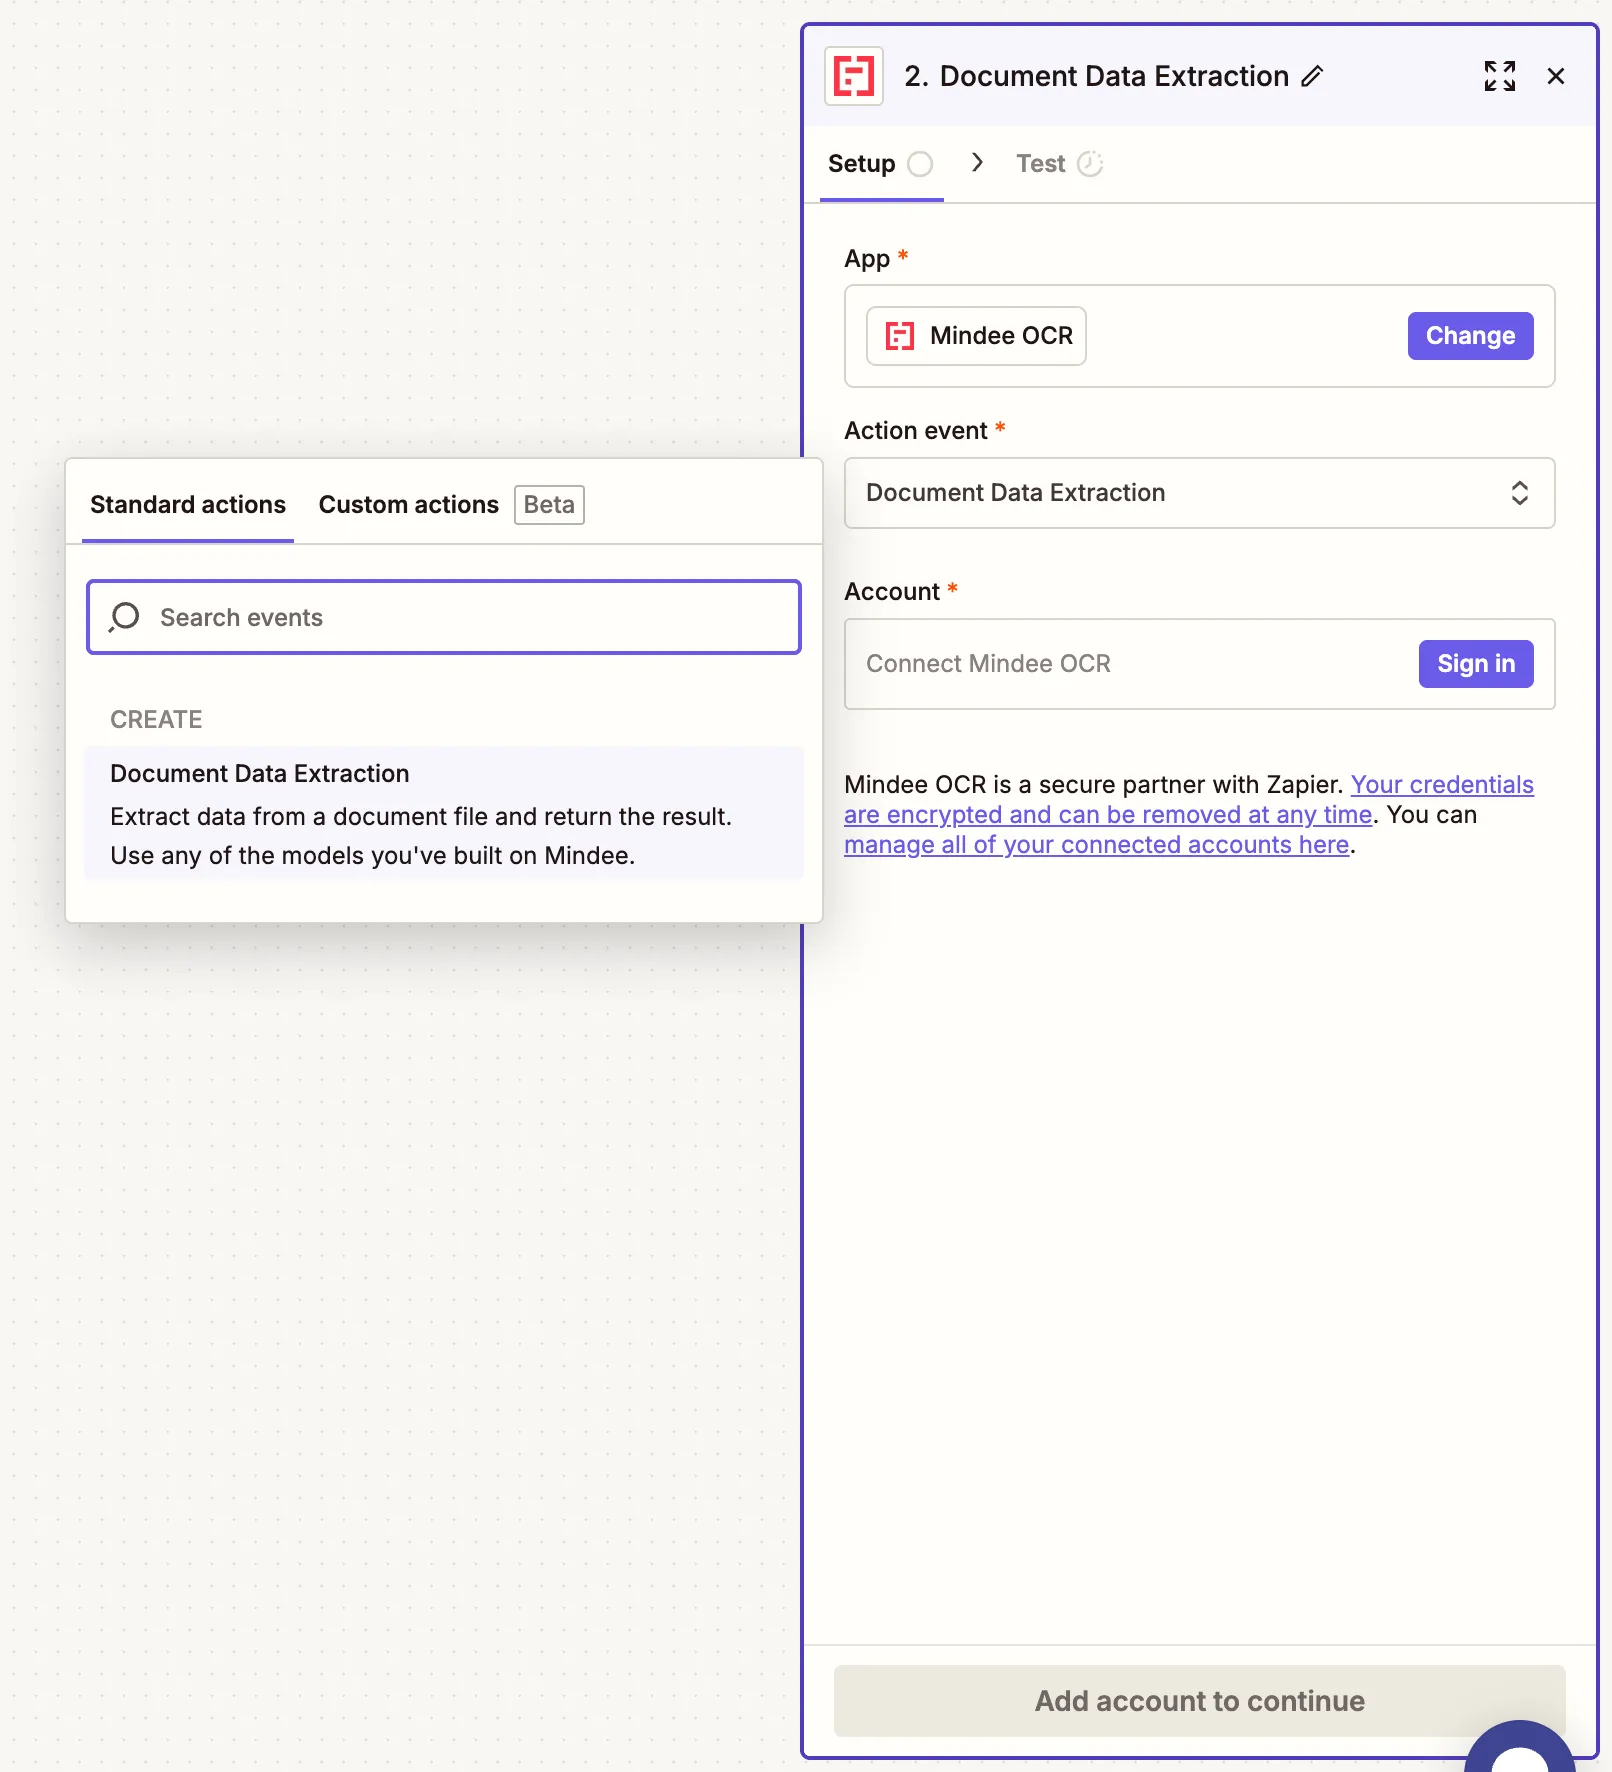
Setting up the Mindee app in Zapier takes just a few minutes: first, log into Zapier, choose Mindee OCR as an action and add your API key.
Configuring the Data Extraction Step
Once your Mindee account is connected in Zapier, you’ll need to configure the Data Extraction action.
This is where you choose which Mindee model to use and how to handle incoming documents.
1. Choose your model
Under Model to Use, you can select one of your available parsing models: either a pre-built Mindee model or one of your custom models from your organization.
Common examples include:
- Financial Document: extract structured data from invoices and receipts.
- Receipt: ideal for expense tracking workflows.
- ID Card or Passport: for KYC or identity verification workflows.
- Any Custom Model: if you trained your own model with Mindee’s Custom Builder.
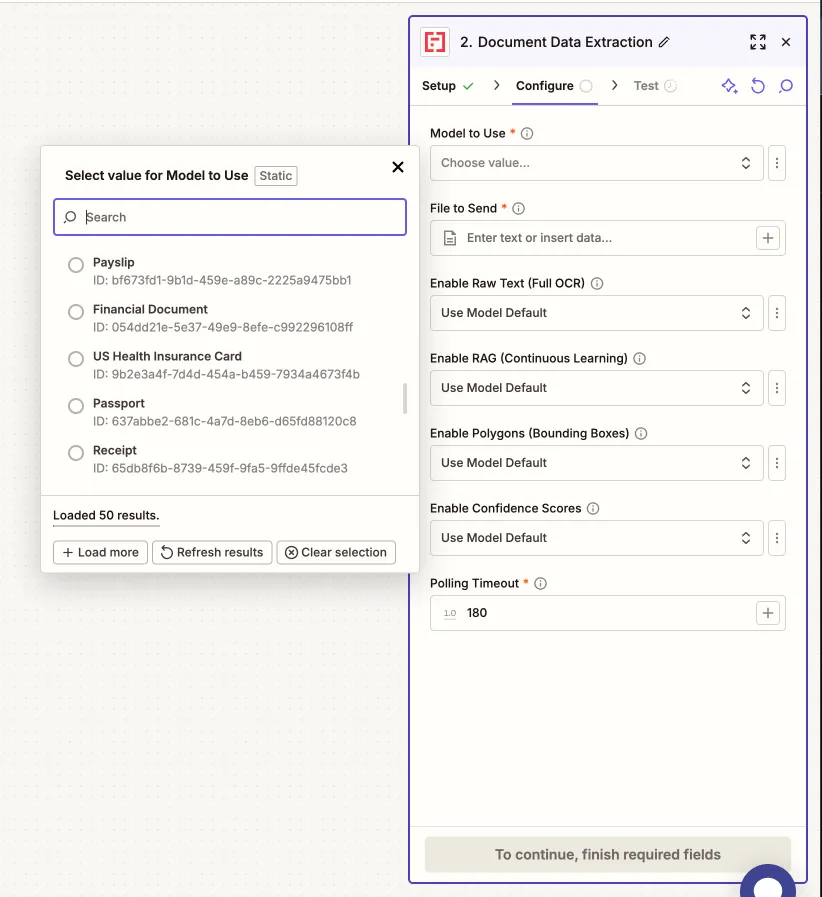
2. Select the file to send
Next, specify the file that will be sent to Mindee for parsing.
If your trigger was a “New File in Google Drive” or “New Email Attachment,” Zapier will automatically make that file available in the dropdown.
You can also copy paste the URL of a sample document to do a quick first inference.
3. Adjust optional parameters
You can further control how the extraction behaves by enabling or disabling the following options:
For further information, you can take a look at our documentation on Mindee's optional features.
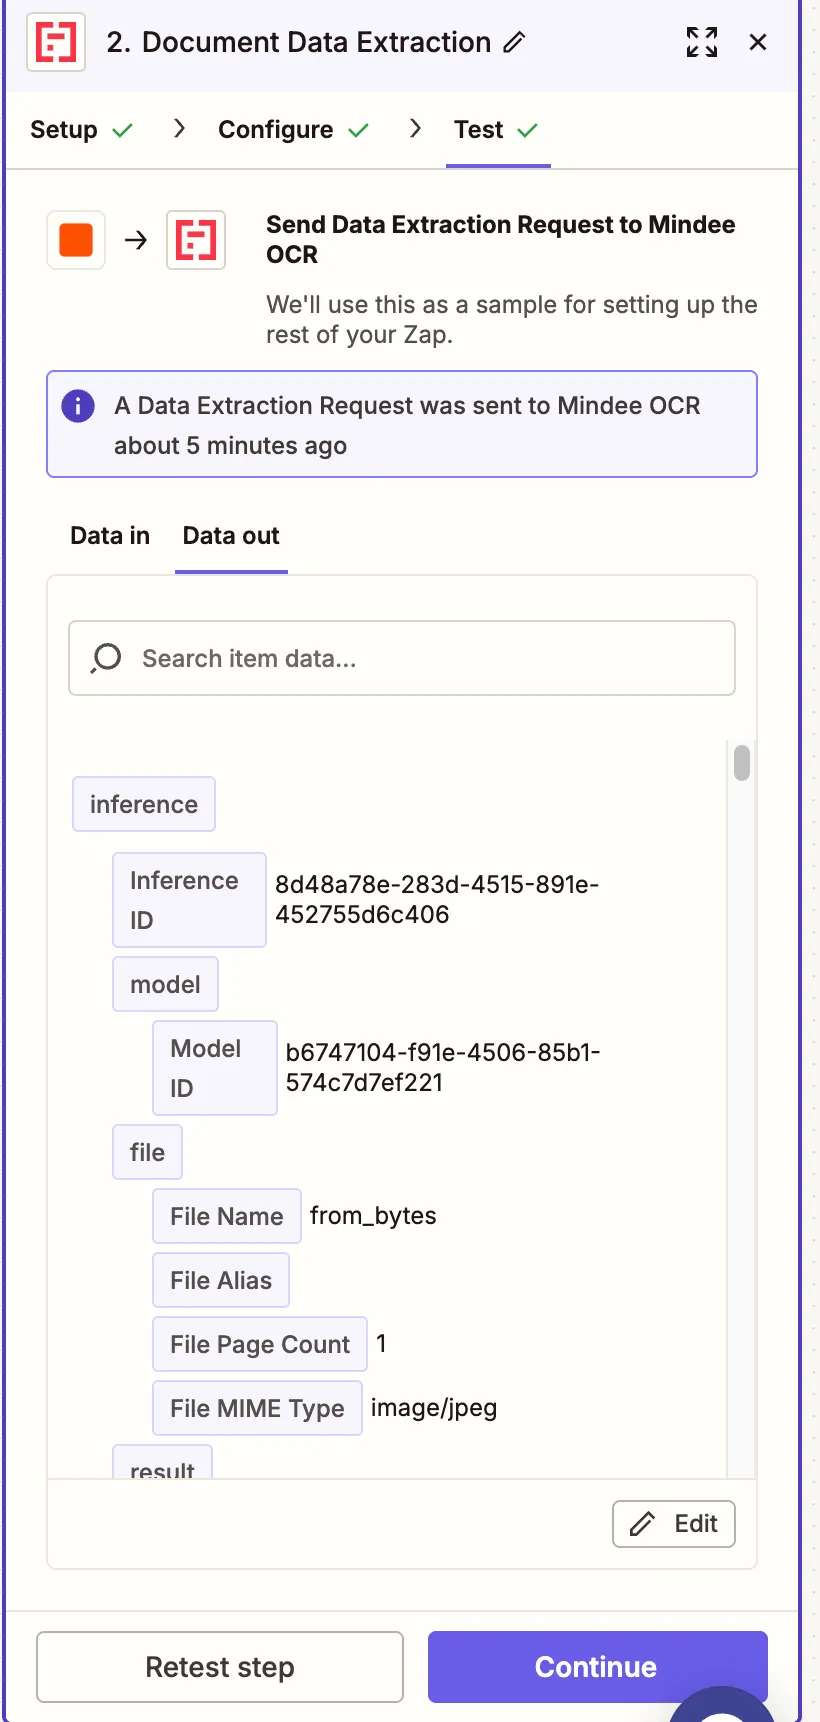
4. Test your step
Once all required fields are configured, click “Test Step” at the bottom.
Zapier will send the selected file to Mindee’s API, extract data using your chosen model, and display the parsed output in the test results panel.
You should see fields like:
Adding next steps in your Zap
After the Mindee extraction step, you can route the data to any of your favorite tools:
Here are three practical automations to get started:
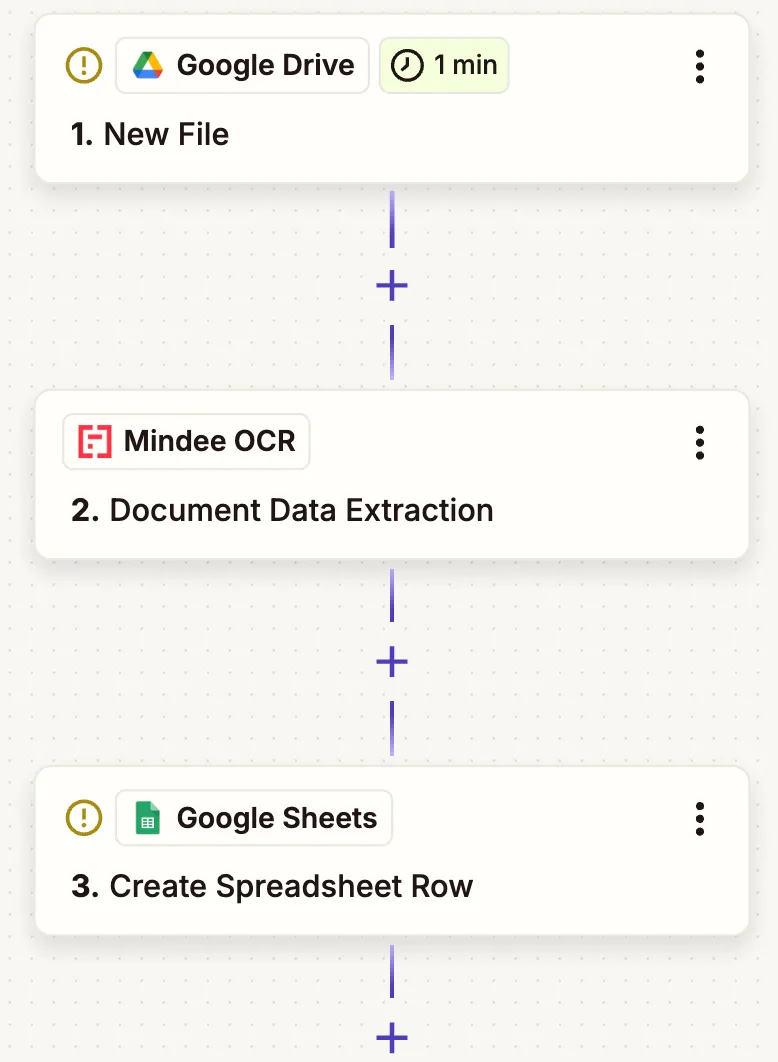
1. Process invoices automatically
When a new invoice lands in your Gmail inbox or Drive folder, Zapier sends it to Mindee’s Invoice Parsing API.
The extracted data (supplier name, date, total amount, VAT, etc.) is then added directly to a Google Sheet or accounting platform.
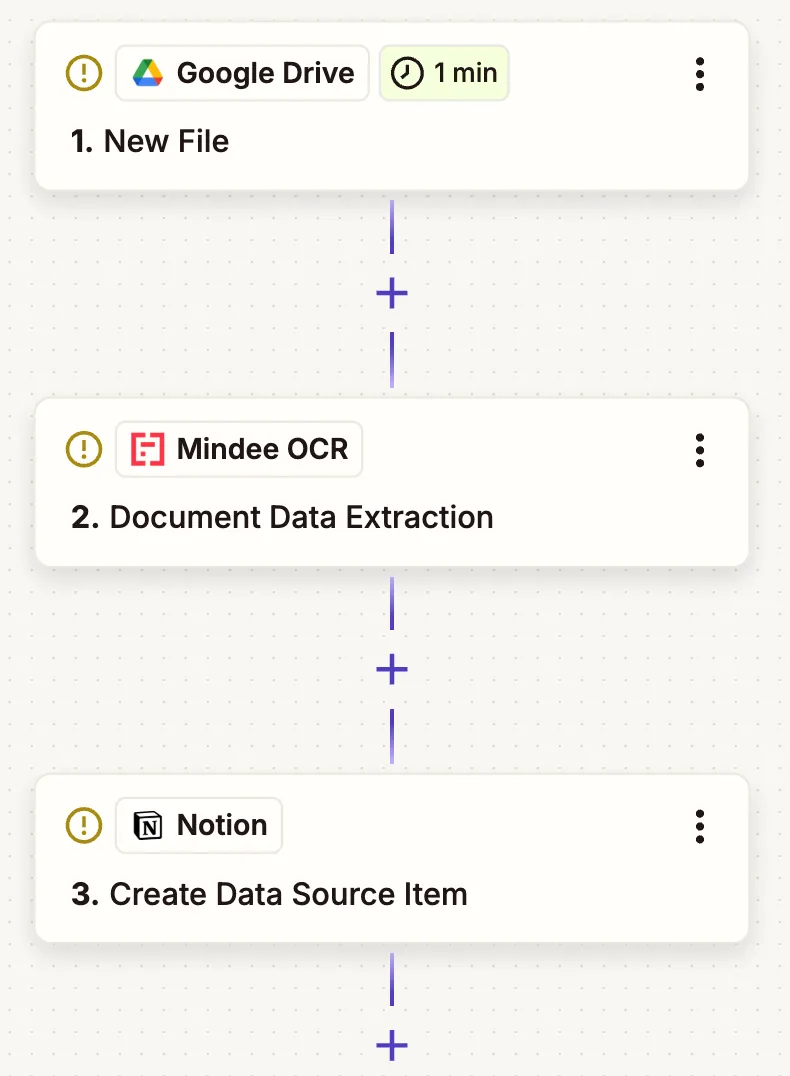
2. Capture receipts for expense management
If your team uploads receipts to a shared folder, Zapier can automatically send those images to Mindee’s Expense Receipt Parsing API.
The resulting fields can then populate an Airtable database, Notion page, or Slack notification.
3. Use confidence scores to automate quality control
You can take your Zapier workflow a step further by using Mindee’s confidence scores to decide what happens next.
Each field extracted by Mindee includes a confidence level that indicates how certain the model is about its prediction. In Zapier, you can use these scores to build conditional logic that ensures only reliable data moves forward while lower-confidence results are flagged for manual review.
Let’s say you’re extracting data from invoices, and you want:
- ✅ High-confidence results (e.g., supplier name confidence = “Certain”) to be added directly to your Google Sheet.
- ⚠️ Low-confidence results to trigger an alert email instead.
Here’s how to do it:
After the Mindee OCR – Document Data Extraction step, add a “Paths” action in Zapier.
Create two branches:
- Path A → Confidence is Certain → Add a row in Google Sheets.
- Path B → Confidence is not Certain → Send an email notification.
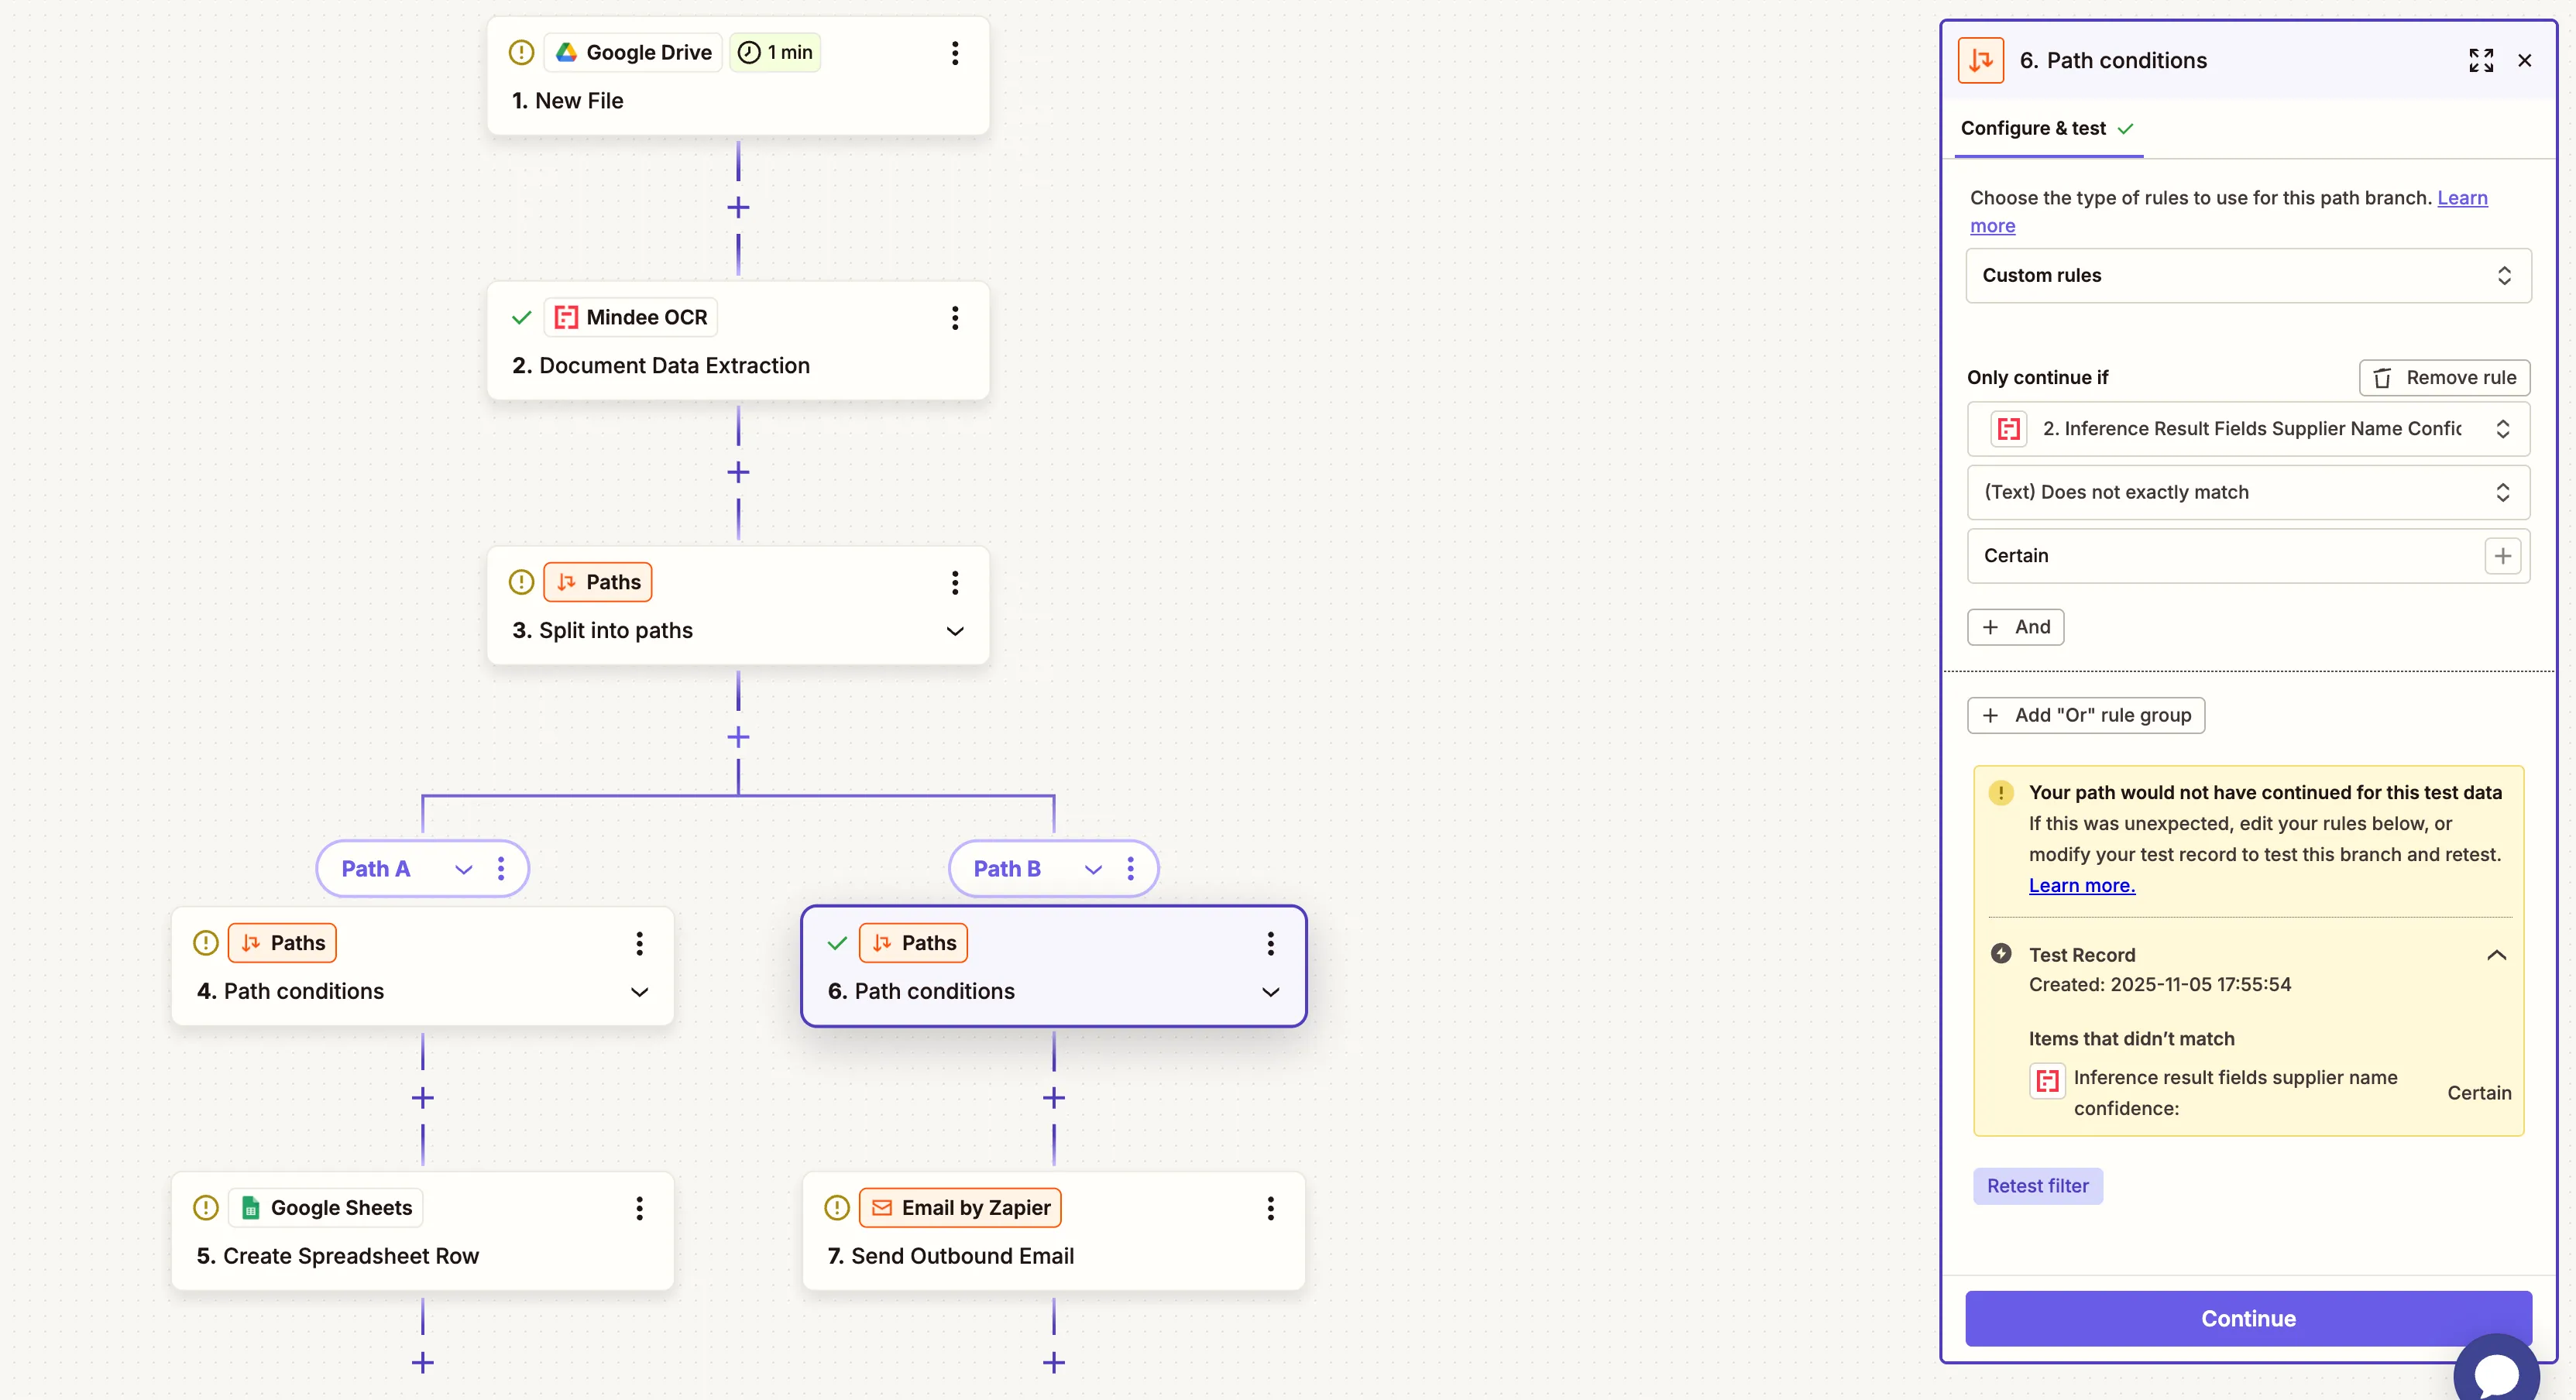
This way, whenever the confidence level for a key field (like supplier name, total, or date) falls below the expected threshold, your team automatically receives an alert without having to monitor every single document manually.
Once you have done a final test, publish your Zap and you're done!
You’ll find detailed, up-to-date setup steps in our documentation:
👉 See the full Zapier and Mindee setup guide
Ready to try it out? Create your first Zap with Mindee in just a few minutes!
About
.svg)

.webp)
%20in%20document%20automation.webp)